

Scandinavian Loom Beading, Level 1
Course Description
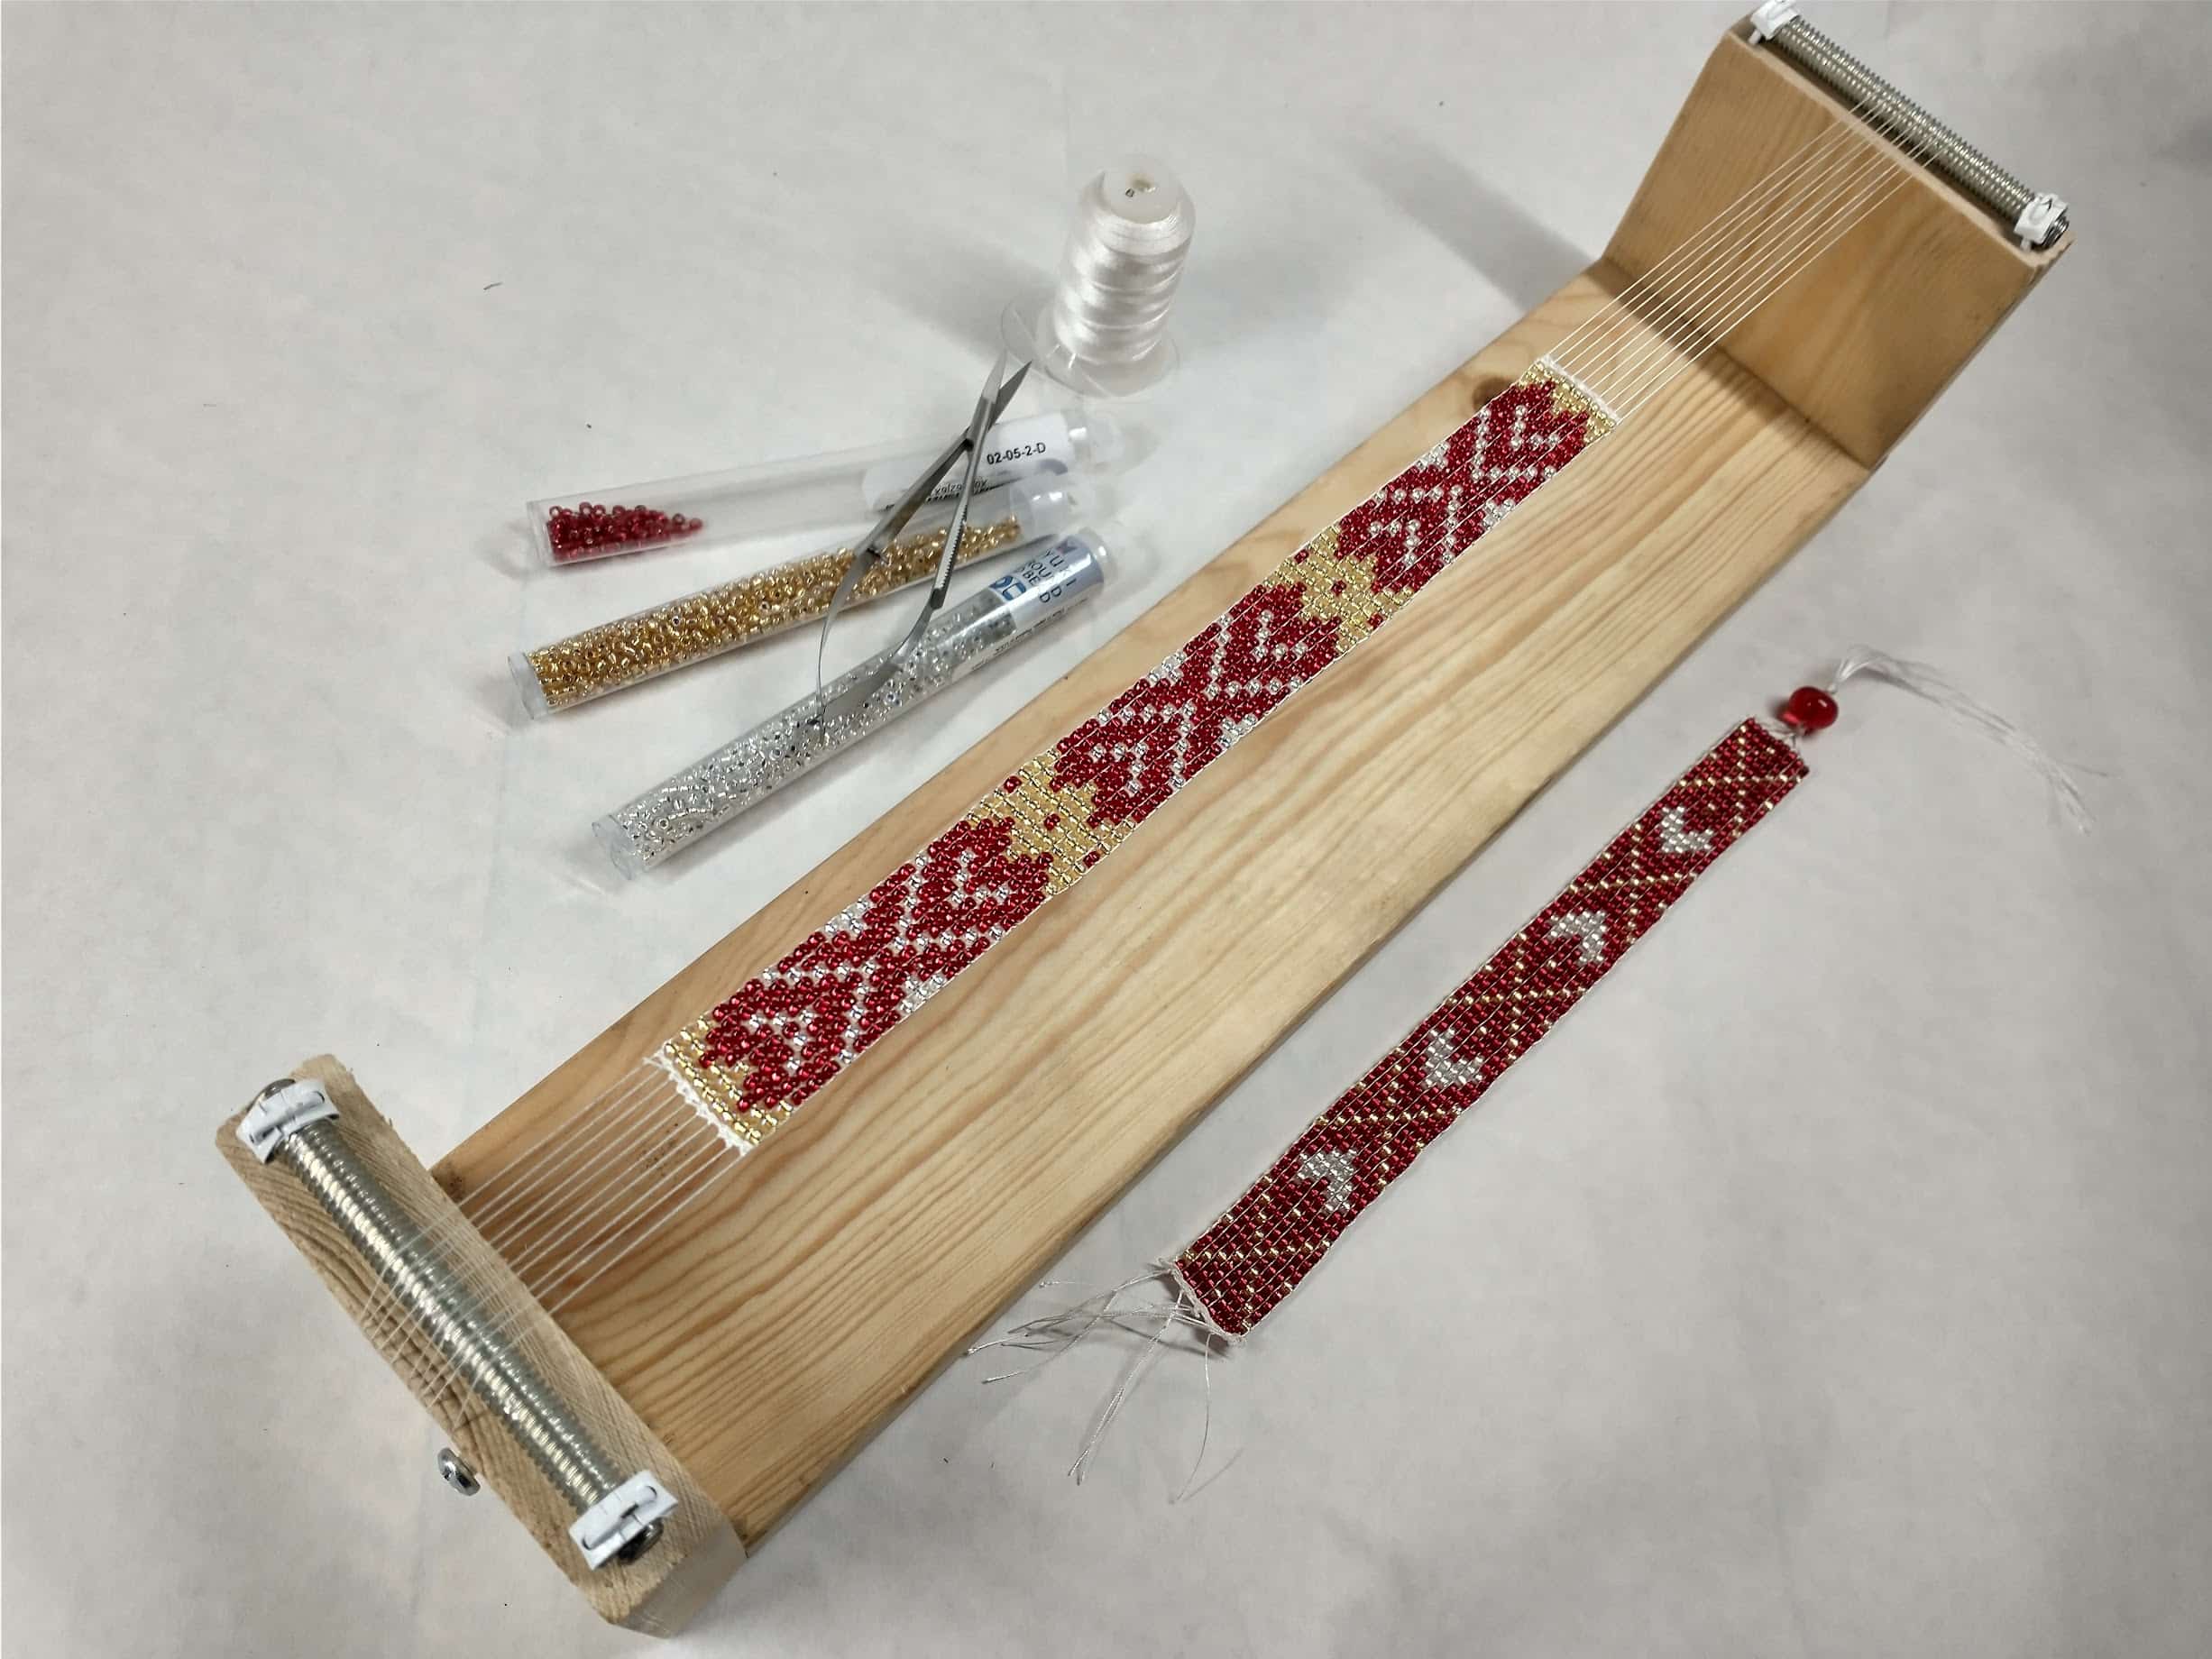
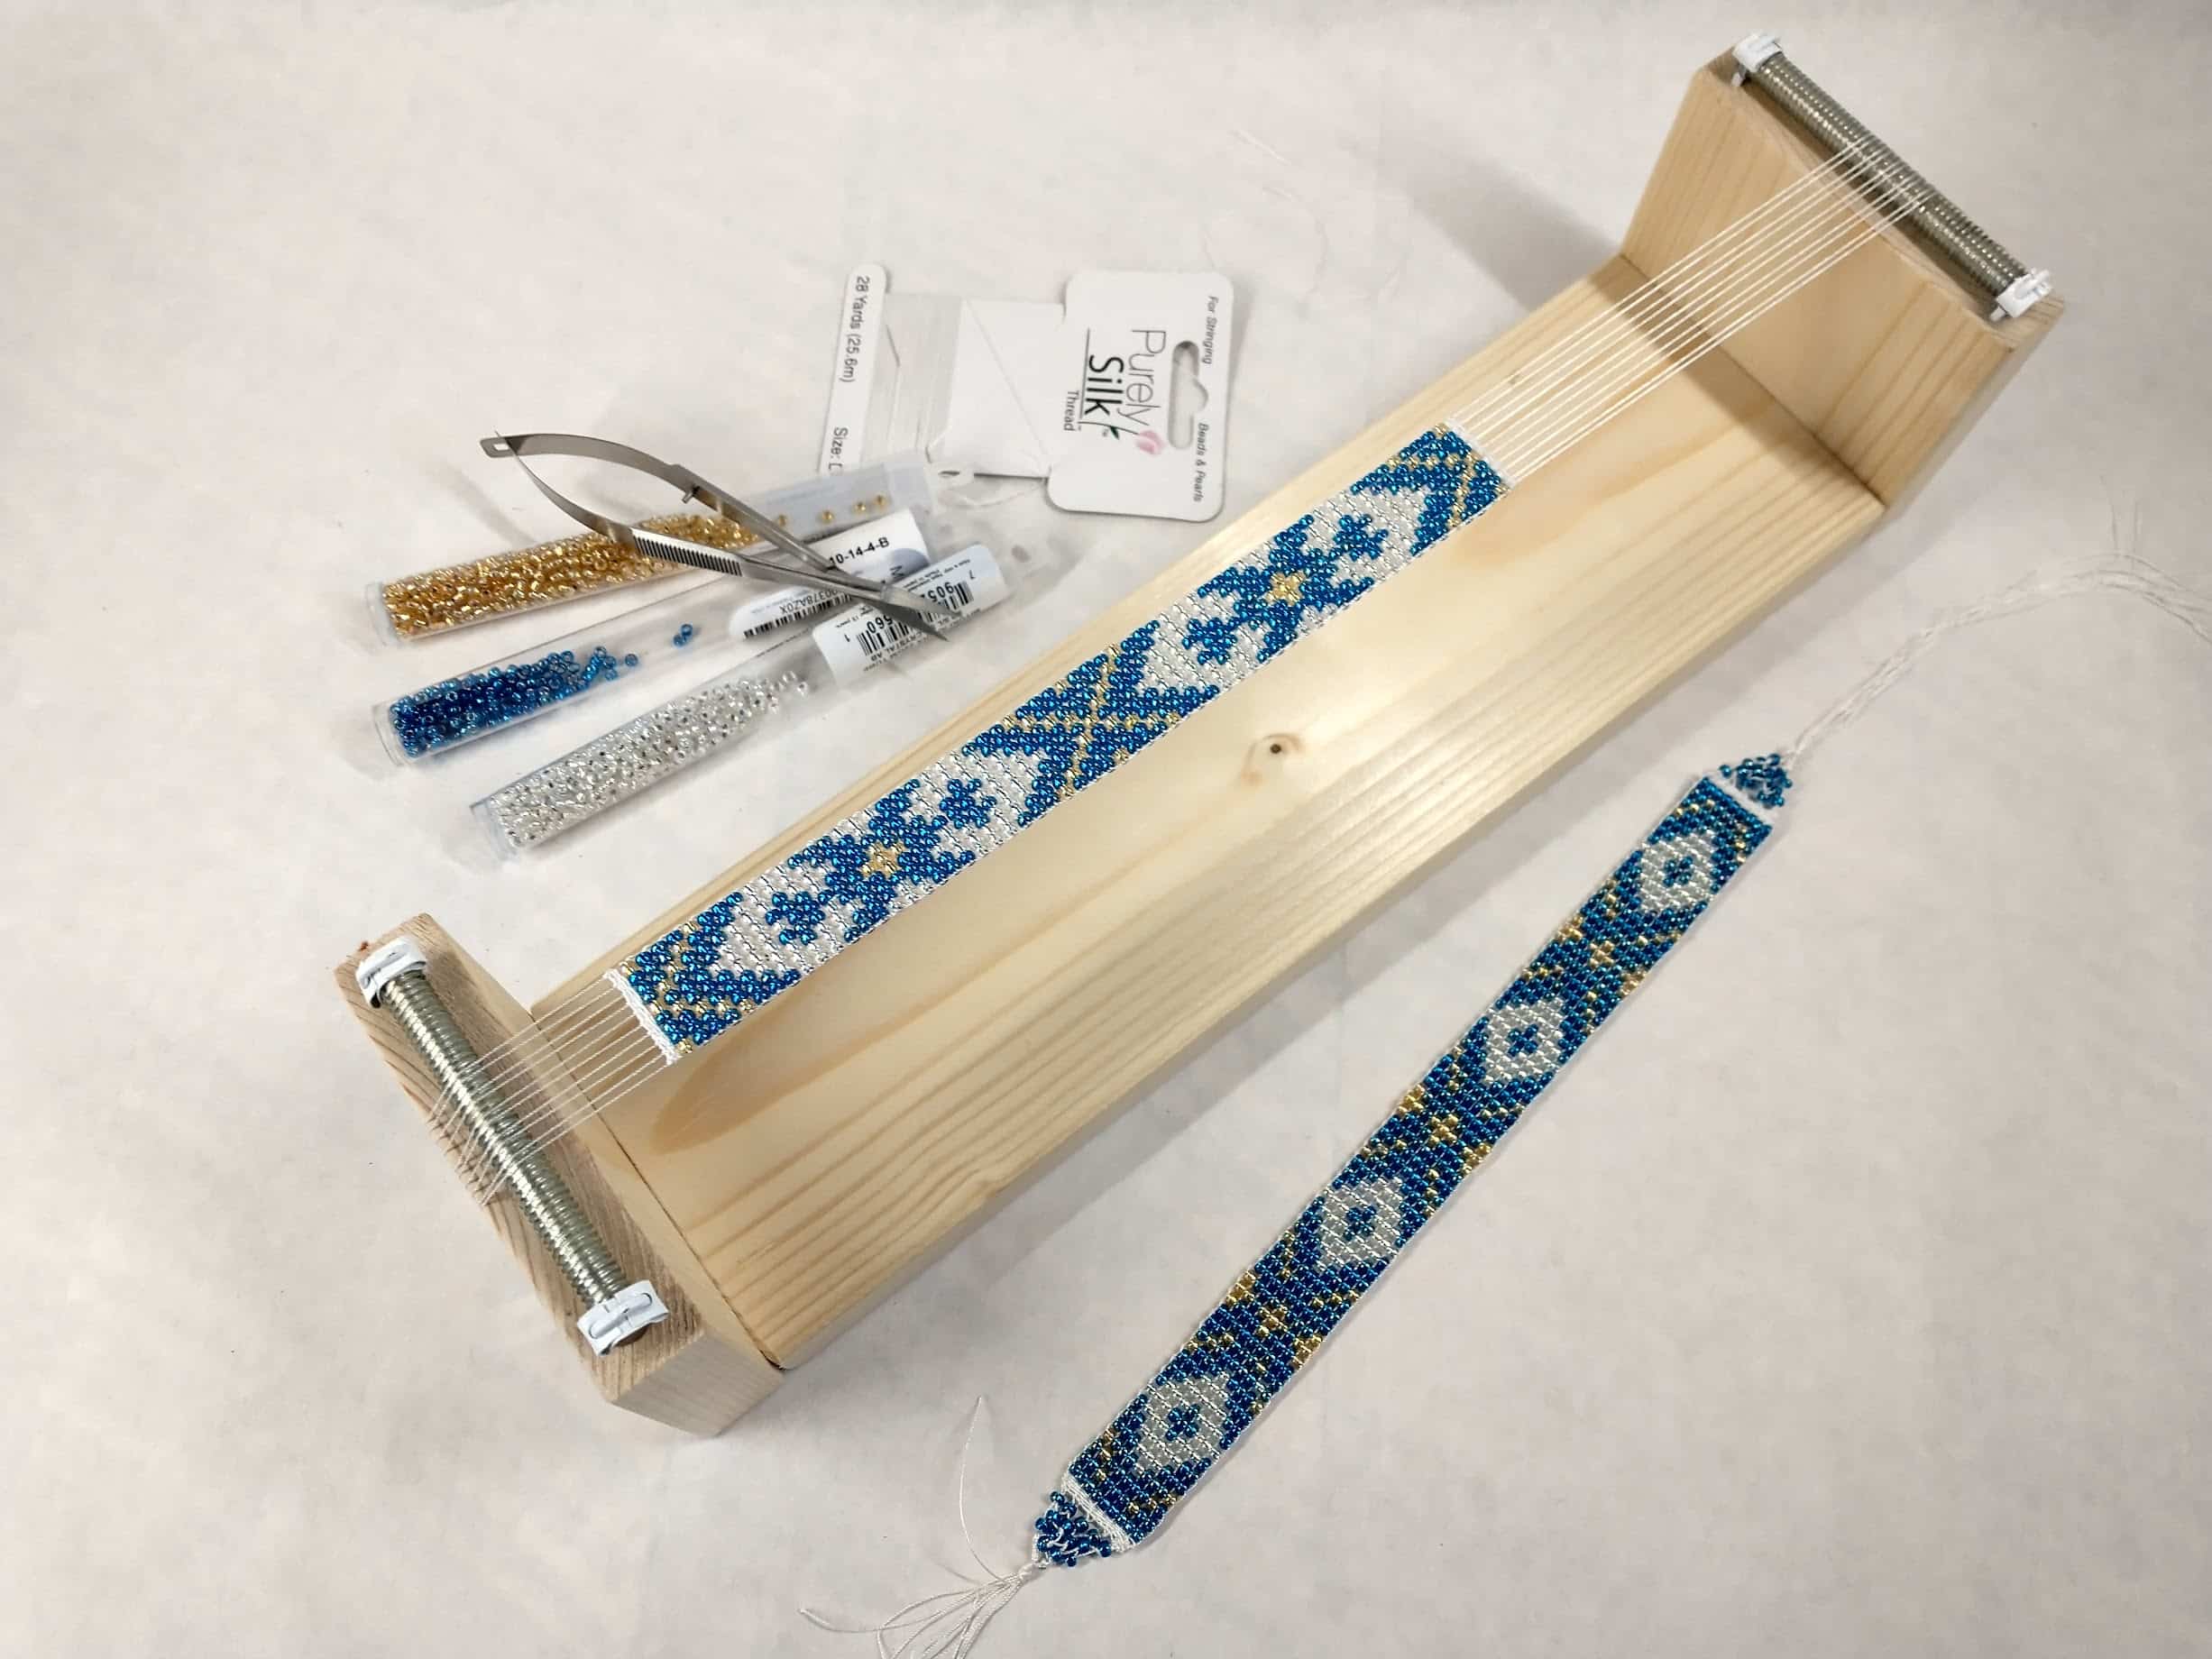
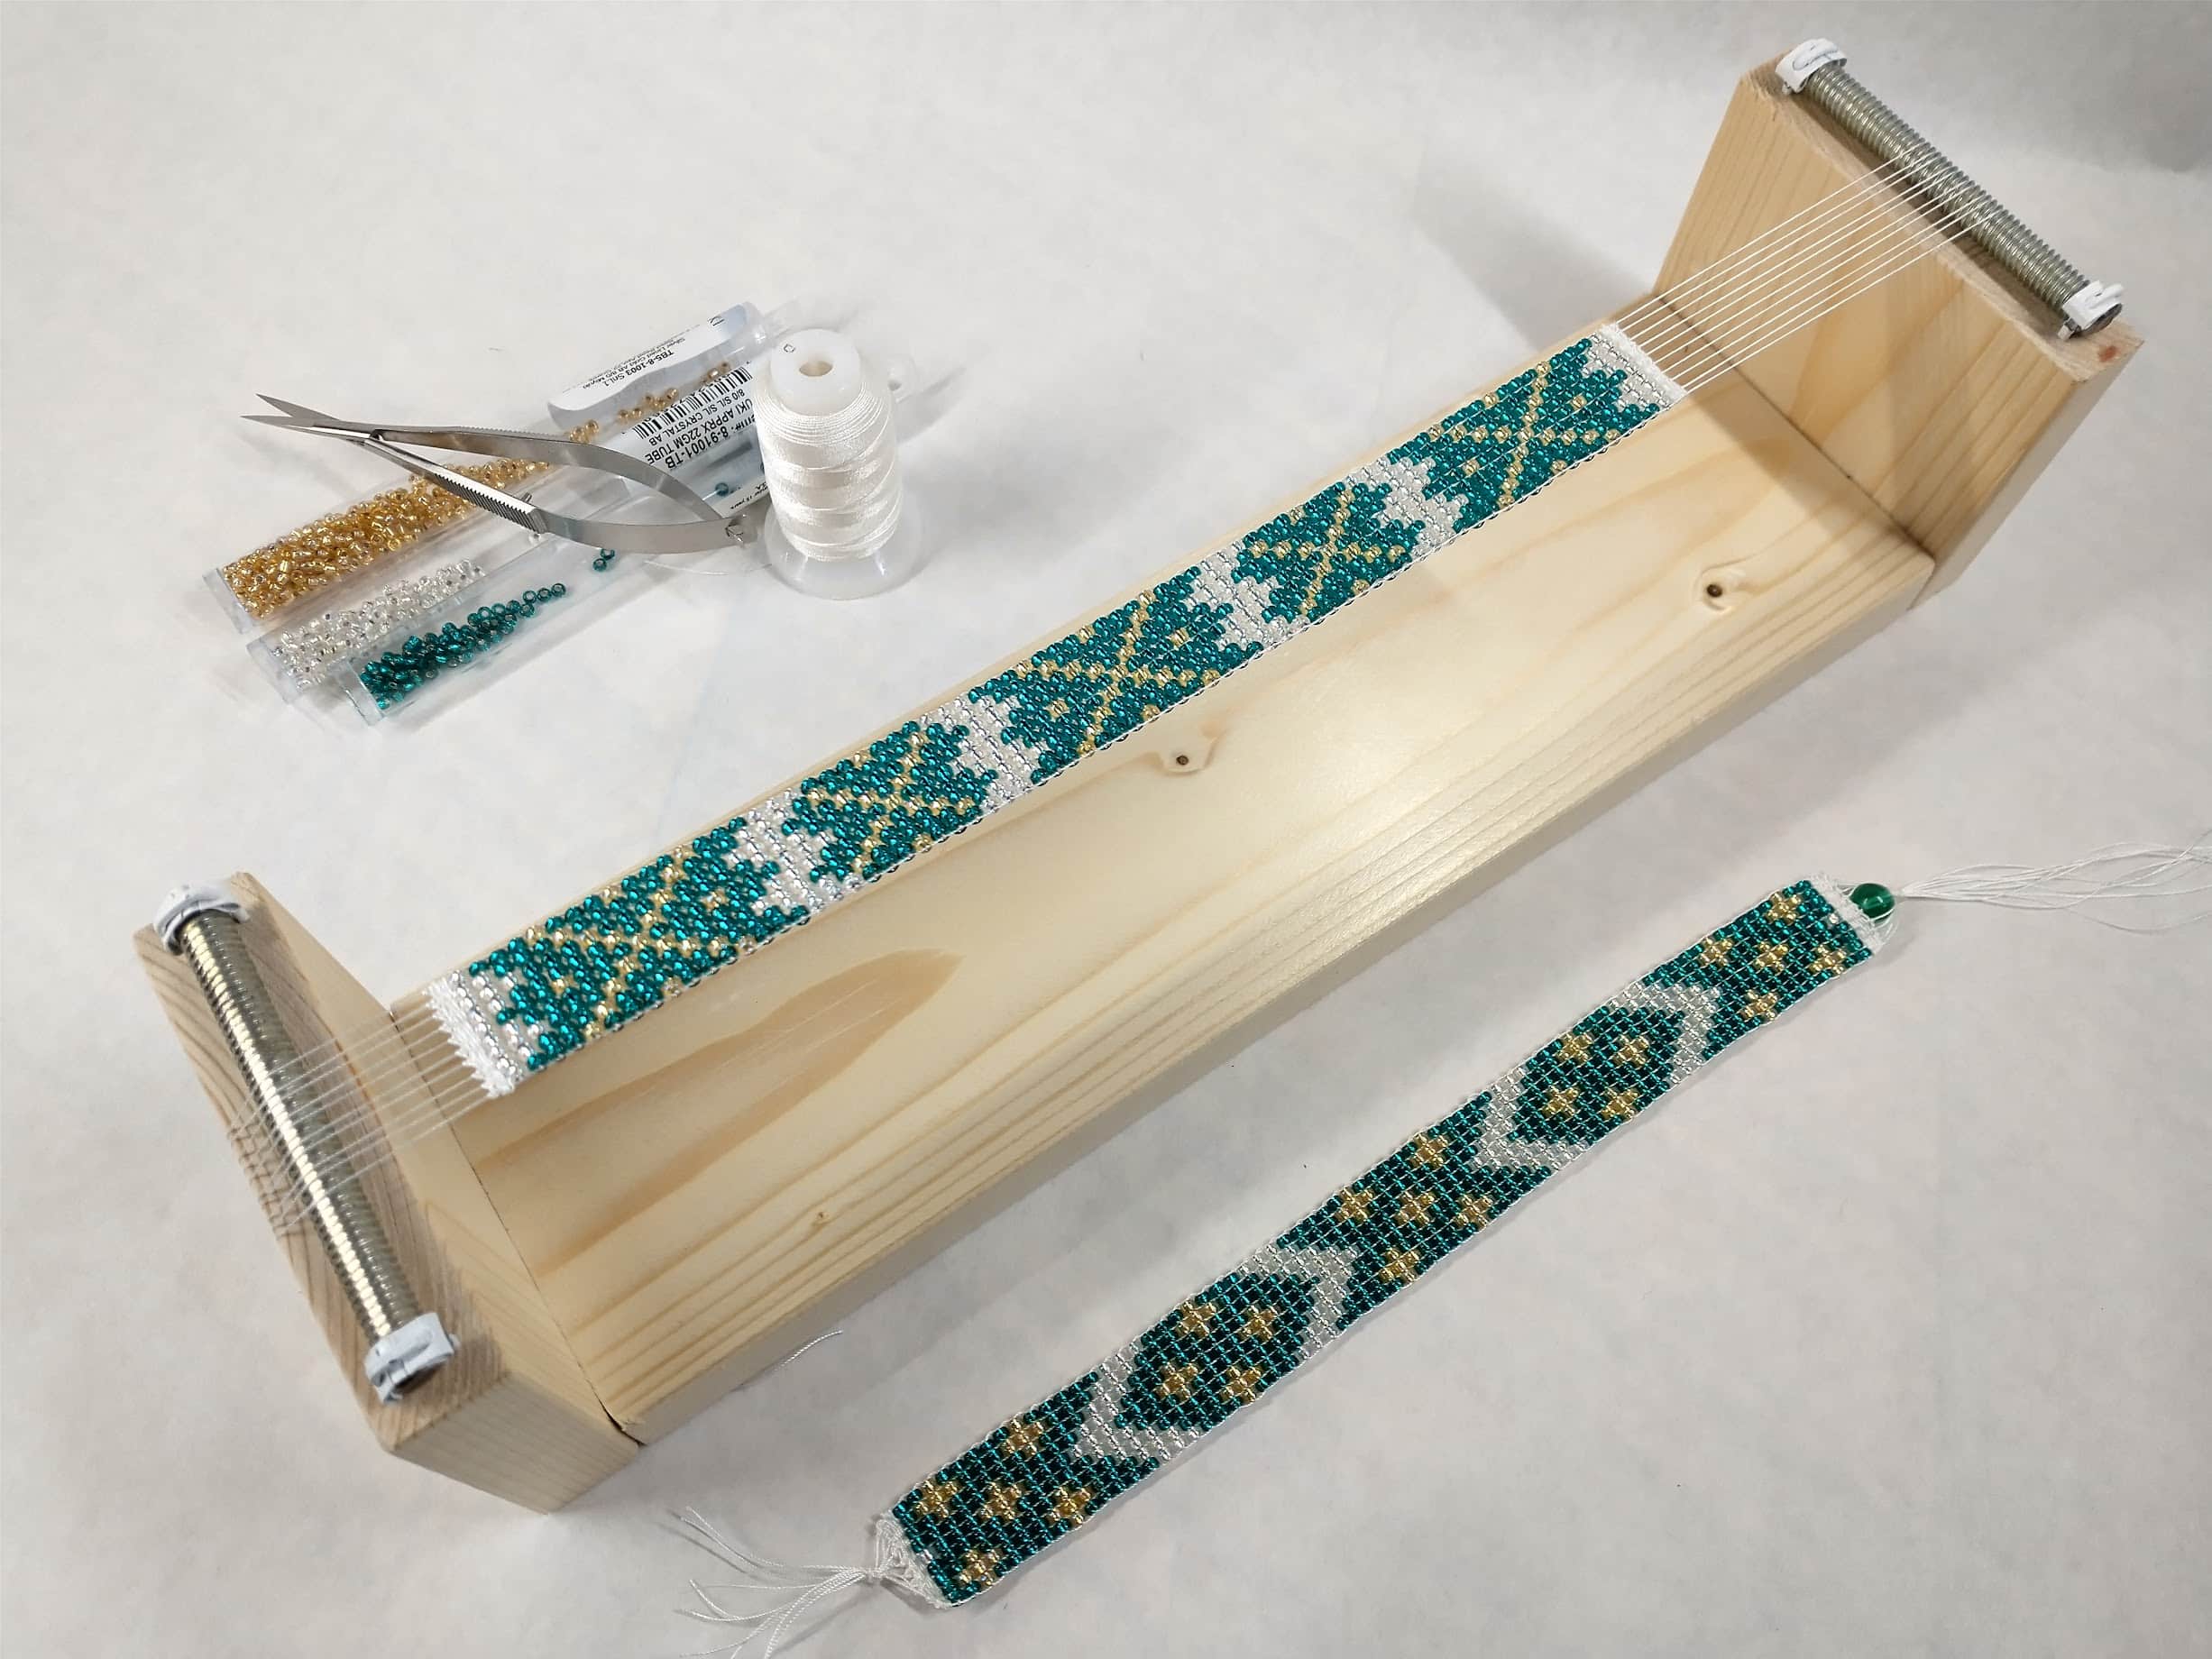
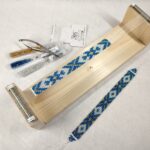
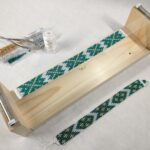
Explore the beauty and fun of beading on a loom in the Scandinavian tradition! Inspired by designs from Nordic bandweaving, this class will take you from start to finish for making your own sparkly beaded bookmark. Learn about the historic use of loom beading and how a remarkably simple process can transform seed beads into delightful designs. The class kit includes a handmade loom designed by the instructor and enough beads, silk thread, needles, and patterns to make two projects, if you wish.
Students must provide a sharp thread scissors and good lighting.
Kit Details
Scandinavian Loom Beading, Level 1 kit includes (please indicate in order notes if you would like red, blue, or green theme):
- Hand made wood beading loom that I designed for ease of warping
- Size D silk thread
- 2 beading needles
- Size 8 Miyuki seed beads for the 2 projects (gold, silver, and theme color)
- Drafted patterns for the projects
- Digital access to a process photo essay and video tutorials
Why two projects? Loom beading is a much more straightforward process than tapestry weaving. Some students will take their time, while other students will zoom ahead. While I will be teaching the students one project (the slightly harder one), taking my time to offer troubleshooting and process discipline, I also want to keep the speedy students engaged. Students who only finish one project during class will have something to look forward to afterwards. Practice is always good! Plus, they can choose to keep one bookmark and give the second one away to a friend.
Why silk? The industry standard in contemporary beadwork uses nylon thread. This is NOT my material of choice for several reasons. Nylon will not hold knots and must be melted (typically with a lighter) in order to hold. As a weaver, I am much more confident tying knots than melting threads. Also, nylon was not historically available. Silk holds knots well, works smoothly, is easier to thread than nylon, and is a natural fiber. Silk, as a protein fiber, is also incredibly strong and durable, meaning many years of enjoyment of the finished project. It also feels wonderful in your hands!
Learning Outcomes
By the end of class, students will be able to:
- Warp their beading loom
- Start and stop a piece using a header technique
- Read a graph chart for beading patterns
- Bury a finished thread and start a new one
- Fix common problems
- Finish the fringe ends
Students are welcome to submit questions and images of their project via email to Laura for help, troubleshooting, and checkins. Stitch on!